The availability of ready-made furniture is omnipresent and seldom does one consider how long it takes to make a finished product, especially when it’s a one-of-a-kind piece. During a project, I captured several in-process photographs to show the steps often required to produce custom furniture.
When a client explains their wishes, the process starts with lots of questions regarding use, size, shape, wood specie, desired finish, time frame, etc. Even for a simple project such as a customer furniture table with 4 legs, I always start with some sketches.
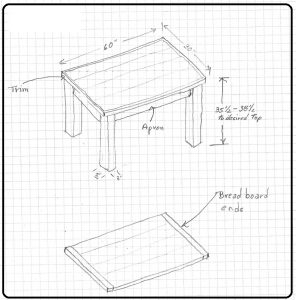
The drawings becomes more refined after some feedback so the client can envision the finished product better.
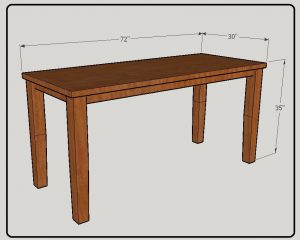
 The real fun starts once I’m given the “go-ahead” and a deposit (often to cover the material costs). Sometimes I will make a more detailed drawing for myself to better visualize a joint. I would prefer to make a mistake on paper rather than once I start cutting wood as it’s a lot less expensive.
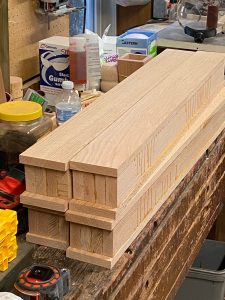
We are most fortunate to have Cormark International here in Weaverville, NC, a supplier of both domestic and foreign wood species. I was able to hand select my lumber from a large pallet load of kiln-dried oak in 4/4s dimensions.
Rough Cut Lumber
One purchases at a lumber yard a 1″ X 12″ that is actually 3/4″ X 11 1/4″. At Cormark, buying rough cut lumber allows for the final dimensions to be thicker and more stable. So, 4/4s dimensions, pronounced “four quarters” is a true 1″ thick and a 6/4s would be 1-1/2″, etc..
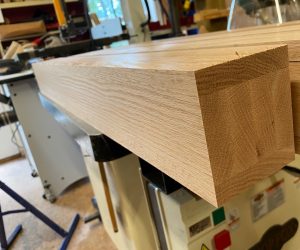
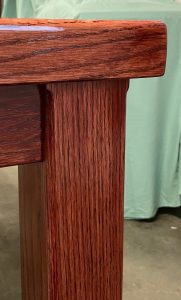
The wood preparation starts at a planer to achieve a final thickness. In this case, I planed all the wood to be 7/8″ thick which removed the rough cut saw marks. And then I started cutting the leg components as well as the table top sections. The legs’ “quarter sawn” wood faces will be exposed more than the end cuts is shown below.
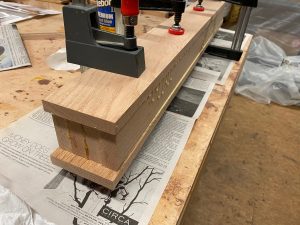
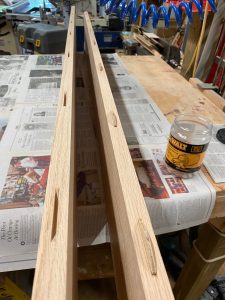
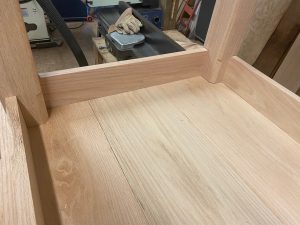
Gluing little wood “biscuits” into the table top edge joints strengthened it along the full length of the board.

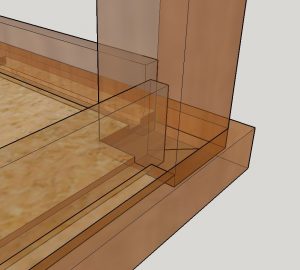
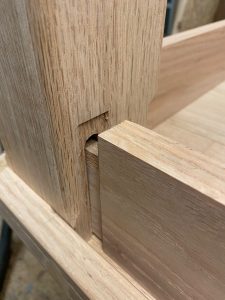
Creating mortices and tenons is a time consuming but rewarding process. The “double” inlay not only strengthened the joints but also hid any glue pushout.
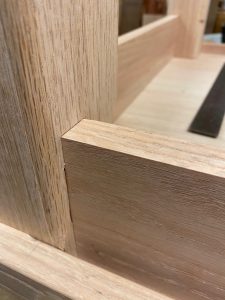
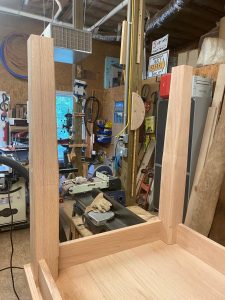
With the legs’ edges routed using a 1/2″ round-over bit, it was time to dry assemble the components to make sure everything fitted in place.
Sanding and Staining
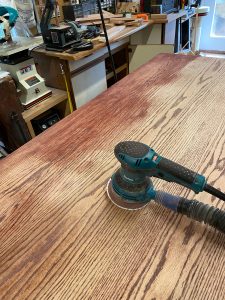
It was time to start the tedious but all so critical process of sanding everything. I disassembled all the components and depending on the surface, I started with 60 or 80 grit (very course) sand paper and progressively moved up to 100, 180 and then 220. I started over again after staining if I didn’t like what I saw. Note in the left photo below the “splotchiness” (if this isn’t a word, it should be). I had applied a wood stain wood conditioner meant to prevent such so this was discouraging. But after a total of 5 stain coats and 5 polyurethane coats, I achieved a finish end result.
Finishing Touches
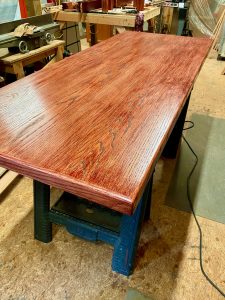
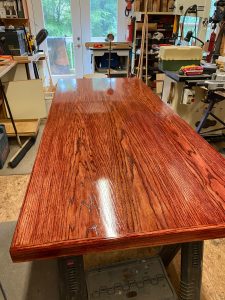
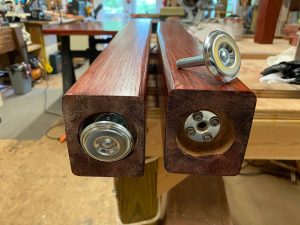
Finally I achieved a stain and polyurethane finish of which I approved. For the legs, I drilled and inserted some “equalizers” knowing that the table was going onto a tile floor which sometimes can be uneven.
It was time for final assembly and glue-up with the finish dry. In my case, I had to transport everything upstairs in components from my basement which was no small undertaking. When originally designing this home, I suggested building my shop at street level and having our kitchen in the basement but my wife didn’t like the idea.
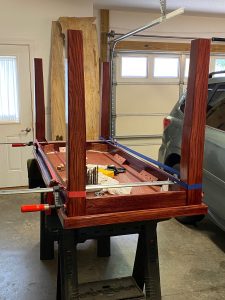
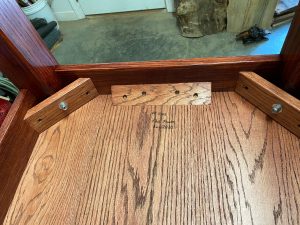
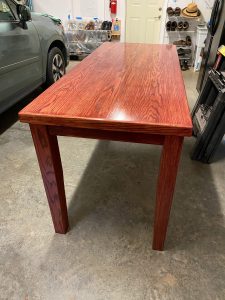
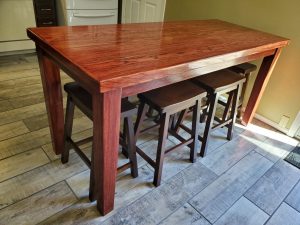
After clamping and gluing, the finishing touch was to add some structural components and then finally a signature. I number all my projects and maintain a log for my own reference. Shown below is the finished table both in my garage as well as the client’s home.
The actual hours that go into a project often far exceed the estimated hours when making a quotation. I once asked a fellow woodworker how he estimated his hours when pricing customer furniture, and he started laughing. But his advice was sound and one by which I live.
Sound Advice:
It was something like this: Unless you’re in the elite league making very high end furniture for high end clients, you have to price things where they are affordable and realistic. Saying that, you have to give a fair estimate as to your hours and don’t think about it again. Be happy with the price quoted as long as it’s fair to both parties but more importantly, be happy with the end result you are delivering.
I liked that advise and I live by it.