Waiting for Inspiration:
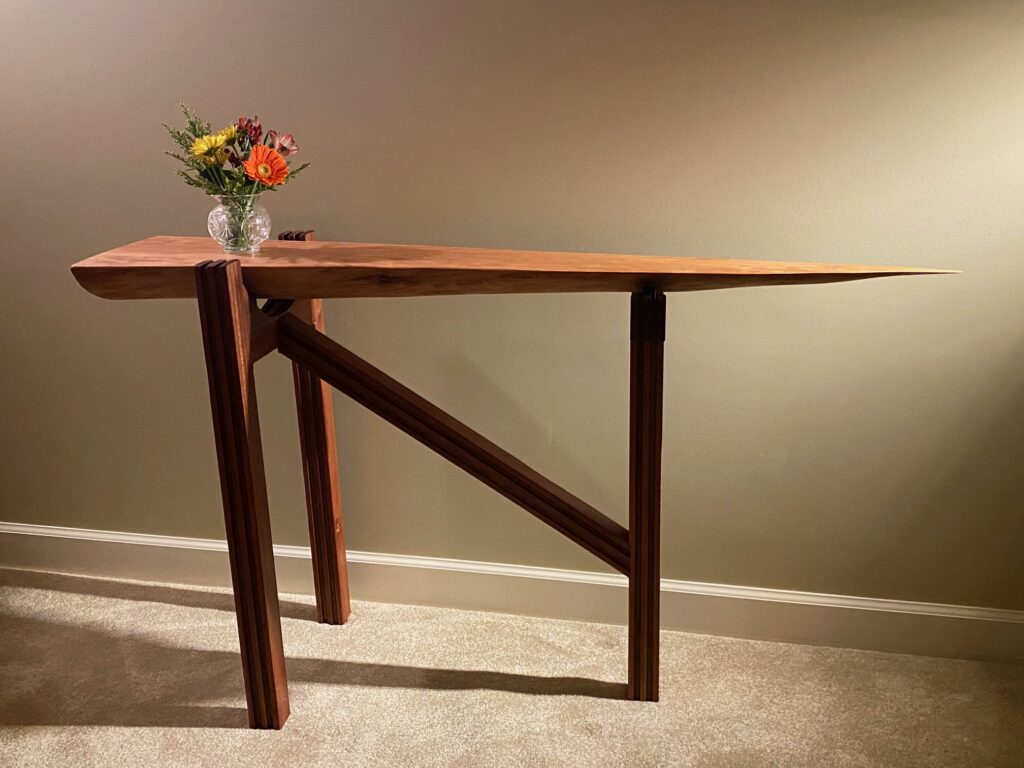
It is likely every woodworker has experienced a similar situation where a piece of wood sits in his or her woodshop waiting for an inspiration. In my case, this piece of airplane wing-shaped cherry wood had been with me for years. The part came from that portion of a tree sometimes called a “cap” which meant it was the first slice cut from a tree at a sawmill when making slabs. It is often discarded.

Staring out the airplane window:
Well, the inspiration finally came to me while I was on an airplane staring out the window. Knowing that it was a long flight, I had taken my sketch book and my cherished piece of wood came to mind. I started sketching various possibilities as shown in my sketchbook attempting to make a hallway table. While I call it an airplane wing, it could be a surfboard, or a spaceship or a bullet or whatever you wish to call it. But what I wanted to create was the feeling of it floating or flying.
Construction:
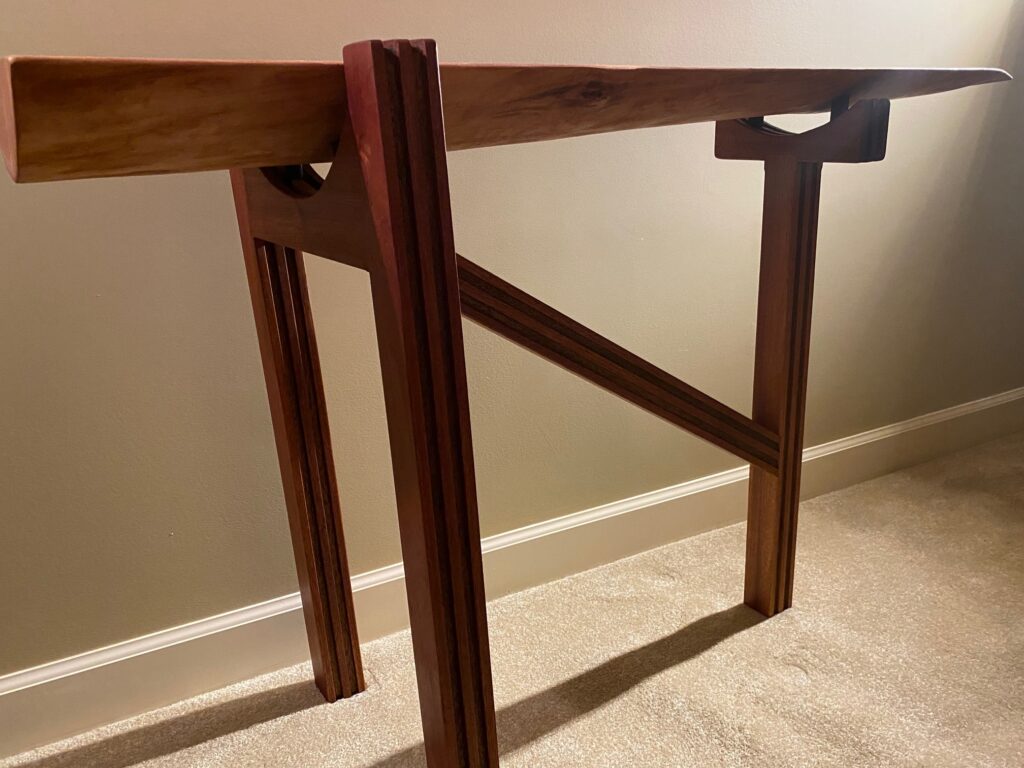
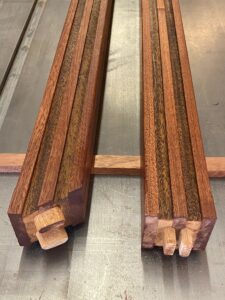
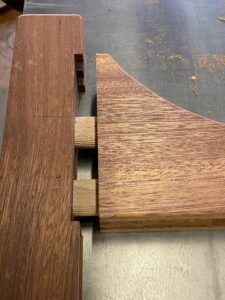
While I mentioned the tabletop was cherry wood, I used for the legs sapele on the triple layers. Because I had an abundance of teak, I filled the two inner layers with it. The gluing and laminating process is time consuming, but it makes for attractive and eye-catching designs. As I’ve mentioned in other articles, I am so fortunate to have Cormark International literally 5 miles from my studio as they are suppliers of domestic and exotic wood.
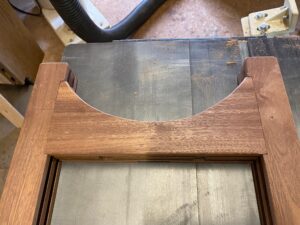
Glued mortices and tenons is a form of joinery. They make for extremely strong construction. Best yet, I got to put to use my Festool Domino Joiner, which cuts PRECISE mortices and makes alignment a lot easier.
Getting the angle and the alignment of the legs and cross stretcher was the next challenge. In woodworkers’ terms, I “snuck up on it” meaning I cut the initial lengths extra-long and gradually sized them to final length and angle by cutting micro-fractions at a time until it fit to my satisfaction. The glue and clamps went on and it sat for 24 hours.
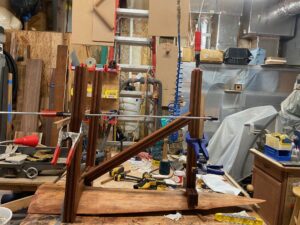
It was difficult to make sure the finished project matched my sketch as the whole-time it was upside down and once I turned it upright, it would be too late to make any modifications. I attempted to stand on my head to view it but that didn’t help. But the finished results pleased me.